A garden rope bridge stands as that perfect touch of whimsy and function, transforming ordinary outdoor spaces into magical realms. The gentle sway beneath your feet, the rustic charm of natural materials against lush greenery; it’s an invitation to pause and play, even in the smallest of gardens.
I’ve built many bridges across my years; some spanning actual creeks, others purely decorative. Each one brings its own character to the space it occupies. The beauty of a garden rope bridge lies not just in its appearance but in how it connects different areas, creating flow where once stood division.
For those embracing tiny house living, a decorative rope bridge adds vertical interest and creates the illusion of expanded space. It draws the eye upward and outward, making modest gardens feel more expansive and adventurous. And contrary to what many folks assume, you don’t need vast acreage or professional carpentry skills to incorporate this feature into your own little slice of paradise.
Let me walk you through the art of building a garden rope bridge that’s both beautiful and sturdy. This isn’t about rushing through a weekend project; it’s about crafting something that will bring joy for years to come. So let’s gather our materials, roll up our sleeves, and create something truly special for your garden sanctuary.
Gathering Your Materials: The Foundation of Excellence
Every worthwhile creation begins with quality materials. For our garden rope bridge, we’ll need:
For the Support Structure:
- Four 4×4 pressure-treated posts (6-8 feet long)
- Concrete mix (quick-setting)
- Galvanized carriage bolts (½-inch diameter, 8 inches long)
- Galvanized washers and nuts
- Metal brackets or plates for reinforcement
For the Bridge Itself:
- Synthetic rope (¾ to 1-inch diameter) – approximately 100 feet
- Manila rope (½-inch) for decorative elements – approximately 50 feet
- Cedar or redwood planks (1×6 inches) for decking – quantity depends on bridge length
- Galvanized eye bolts (½-inch diameter)
- Stainless steel hardware (screws, washers)
Essential Tools:
- Post hole digger or auger
- Drill with bits
- Wrench set
- Level
- Measuring tape
- Pencil
- Saw
- Sandpaper
- Rope cutting tool
The cost for this project ranges from $200-$400 depending on your material choices and bridge length. Synthetic rope costs more initially but lasts longer outdoors than natural fibers. Cedar and redwood resist rot naturally but command higher prices than pressure-treated lumber.
Quality matters here, particularly with the rope. Synthetic polypropylene or polyester ropes resist weather damage and maintain strength over time. If you prefer the look of natural rope, know that it will require more maintenance and eventual replacement.
Planning Your Bridge: Measuring Twice
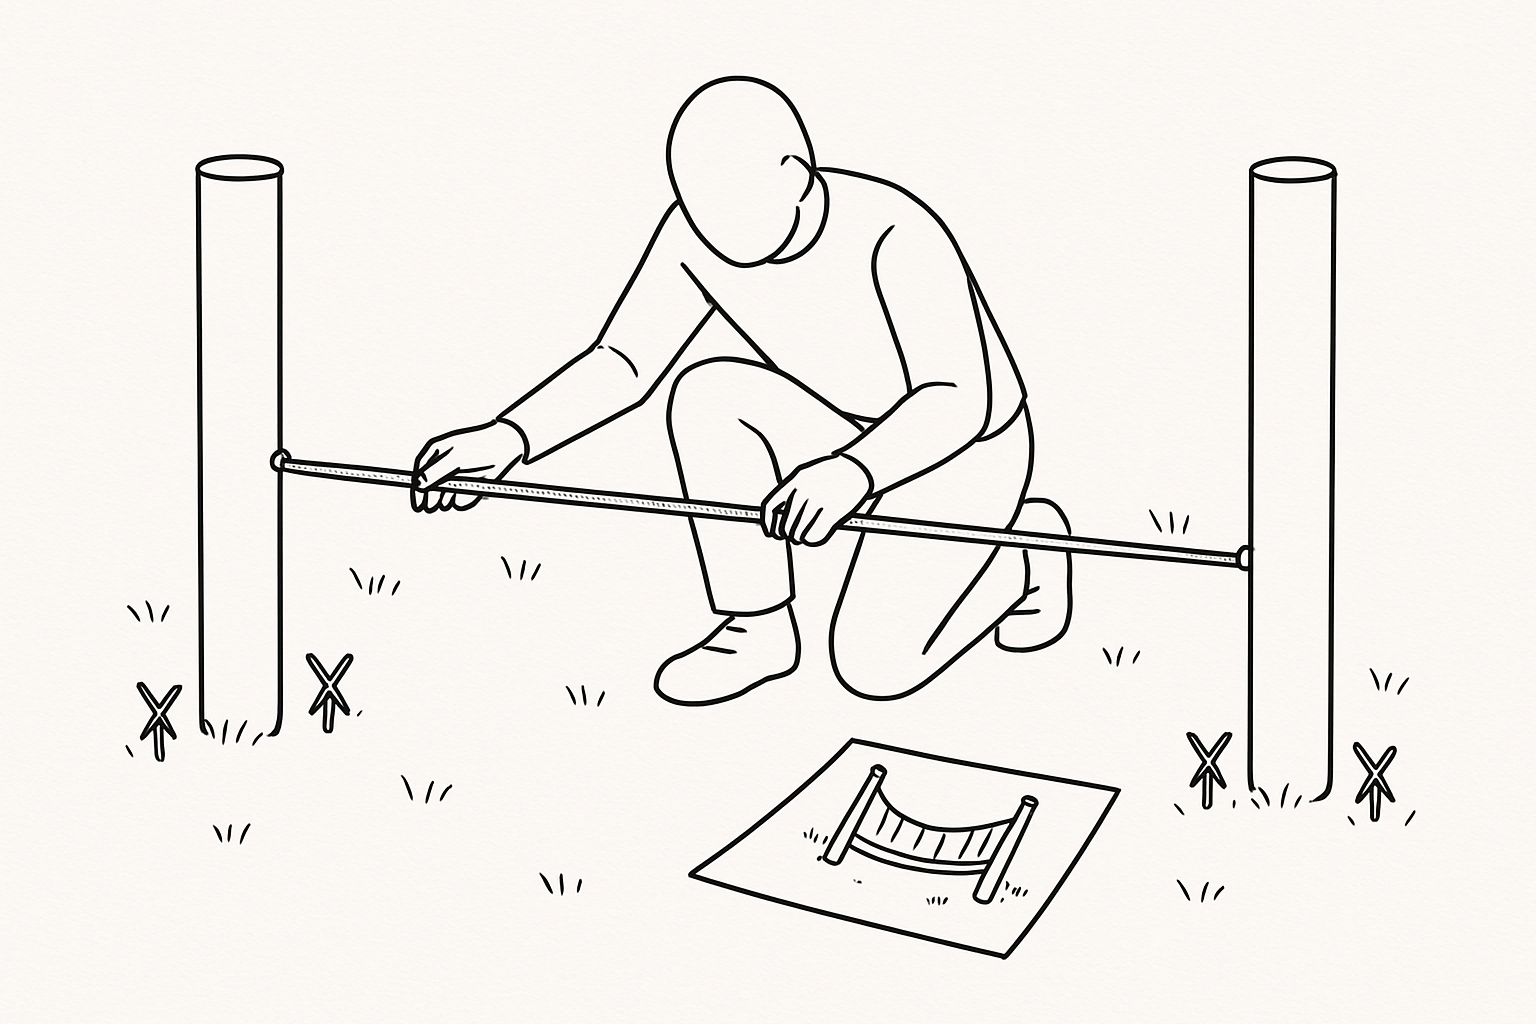
A successful bridge begins long prior to the first hole being dug. Walk your garden space. Feel the natural pathways. Where would a bridge enhance both function and beauty? Perhaps it connects a seating area to a garden bed, or spans a dry creek bed you’ve created for visual interest.
For a decorative garden bridge, a span of 4-8 feet works beautifully. Longer bridges require additional engineering beyond our scope here. The width should allow comfortable passage; 18-24 inches suffices for a decorative feature.
Mark your post locations with stakes, keeping them perfectly parallel. Measure diagonally between opposite corners; when these measurements match, your layout is square. This small step prevents frustration later.
Consider height carefully. A slight arch adds visual appeal, but too much height creates an unstable walking surface. For our decorative bridge, posts standing 24-30 inches above ground create ideal proportions.
Sketch your plan on paper, noting all measurements. This blueprint becomes your guide throughout construction, preventing costly mistakes and material waste.
Setting Your Foundation: The Invisible Strength
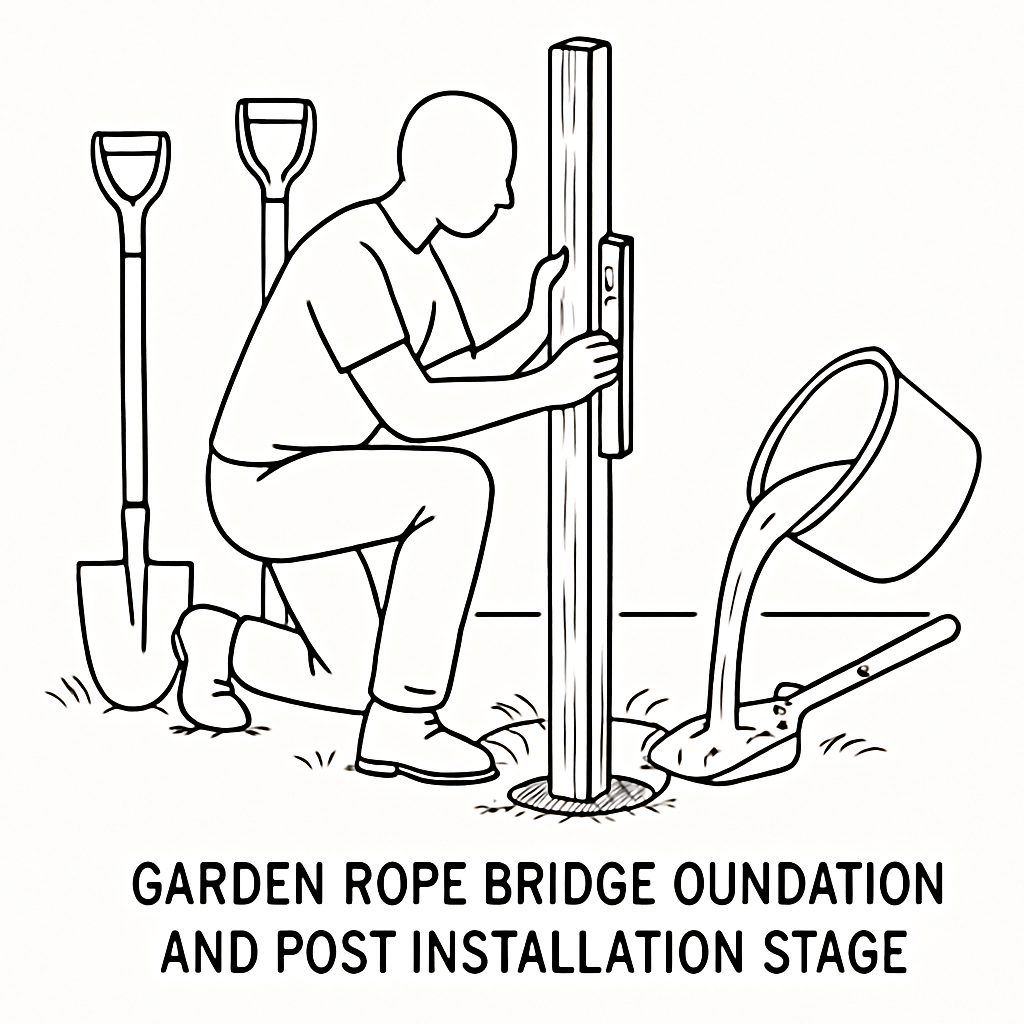
The stability of your bridge rests quite literally on how well you set your posts. Dig holes approximately 2 feet deep and 12 inches in diameter for each post. The depth may vary based on your local frost line. Check with local building guidelines if you’re unsure.
Place a few inches of gravel at the bottom of each hole for drainage. Position your posts, checking for plumb (vertical straightness) on two adjacent sides with a level. Brace temporarily with scrap lumber.
Mix concrete according to package directions. Pour around posts, leaving a slight slope away from the wood to shed water. Allow the concrete to cure fully, usually 24-48 hours, while keeping the posts braced during this time.
While waiting, prepare your bridge decking. Cut planks to your desired width plus 2 inches of overhang on each side. Sand all edges smooth, rounding corners slightly for comfort and safety. If using untreated wood, apply a weather-resistant sealer or stain.
Creating the Support Structure: Building the Framework
Once your concrete has cured, it’s time to create the framework that will support your bridge. Install eye bolts through your posts at identical heights; one pair about 6 inches from the top for handrail ropes, another pair about 10 inches above ground level for support ropes.
Drill pilot holes first to prevent splitting the wood. Secure each eye bolt with washers and nuts on the opposite side, tightening firmly but not enough to damage the wood.
For additional stability, attach metal brackets or plates where the main support ropes will experience the most tension. This reinforcement distributes weight and prevents the eye bolts from pulling through the wood over time.
The positioning of these connection points determines the final shape of your bridge. Placing the lower eye bolts slightly higher than the walking surface creates a gentle dip in the middle; that classic bridge profile that’s both functional and visually pleasing.
Rigging the Main Support Ropes: The Art of Tension
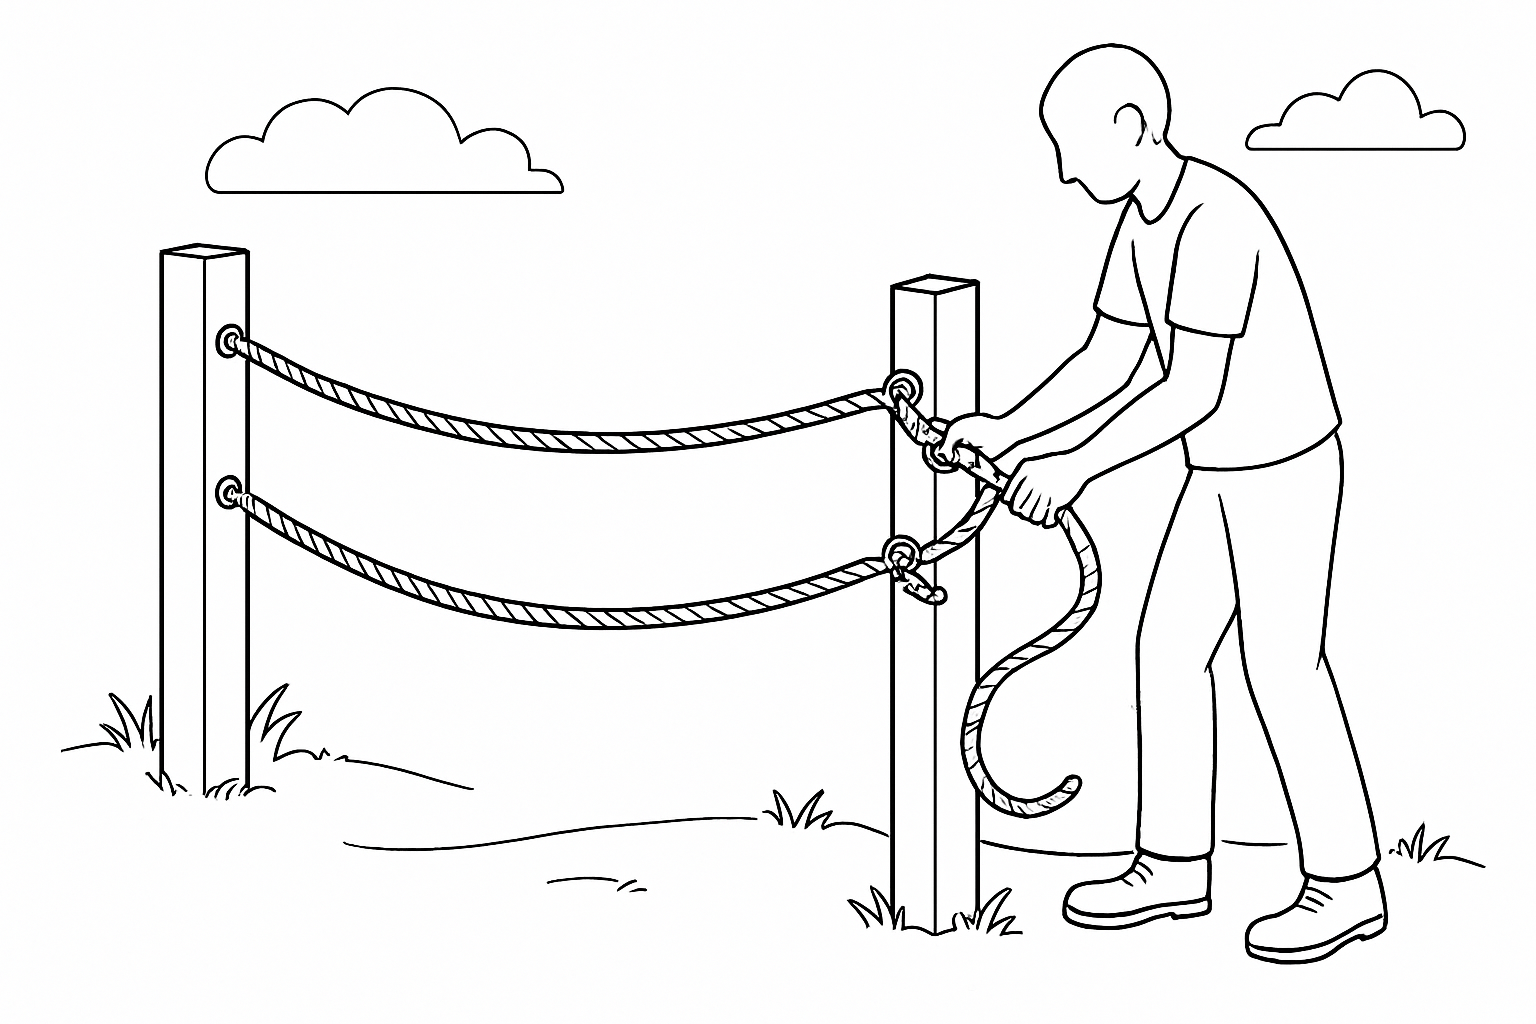
Now comes the heart of your bridge, the rope work. Cut two lengths of your thickest synthetic rope, each measuring your bridge span plus an additional 8 feet for securing.
Thread one end of each rope through the lower eye bolts on one side of your bridge. Tie secure knots; a figure-eight follow-through works wonderfully here. Pull the ropes across to the opposite posts, creating parallel lines.
Here’s where finesse enters the picture. The ropes need enough tension to support weight without sagging excessively, yet not so tight they strain the posts. Thread the free ends through the opposite eye bolts and pull tight by hand.
Secure temporarily and stand back. Look at your bridge profile. Adjust tension until you achieve a slight dip in the middle, about 4-6 inches lower than the attachment points for a 6-foot span. Once satisfied, tie off permanently with backup knots for safety.
Installing the Decking: Creating Your Path
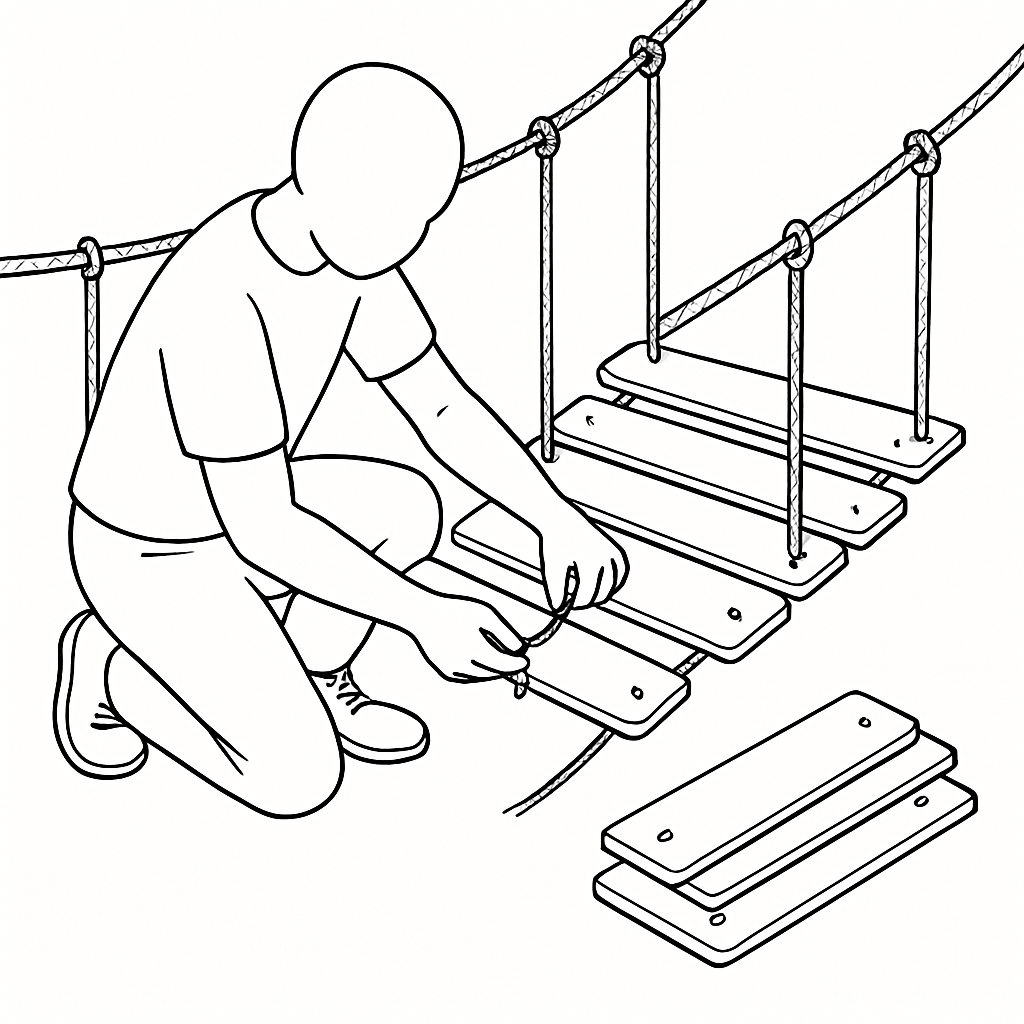
With main support ropes in place, it’s time to create the walking surface. Space your prepared planks evenly along the support ropes, beginning at one end.
For each plank, drill small holes near the edges where they cross the support ropes. Using smaller diameter rope or heavy-duty zip ties, lash each plank securely to the support ropes. Maintain consistent spacing—about ½ inch between planks allows for drainage while providing a solid walking surface.
Work from one end to the other, checking alignment as you go. The planks should lie flat against the support ropes without twisting. If a plank sits unevenly, adjust your lashing technique.
This method allows the bridge to flex naturally while keeping the walking surface stable. The slight movement adds to the charm and experience of crossing your bridge.
Adding Handrails: Safety Meets Beauty
Handrails transform your bridge from merely functional to truly inviting. Thread your remaining thick rope through the upper eye bolts, following the same process used for the support ropes.
The handrail ropes require less tension than support ropes—they’re for balance and guidance rather than weight-bearing. Aim for a taut line with minimal sag.
For added stability and visual interest, connect the handrails to the walking surface with vertical pieces of your decorative manila rope. Space these “balusters” every 12-18 inches, tying them securely to both handrail and support ropes.
These vertical connections not only add safety but create that classic rope bridge appearance that delights the eye and invites exploration.
Decorative Touches: Making It Yours
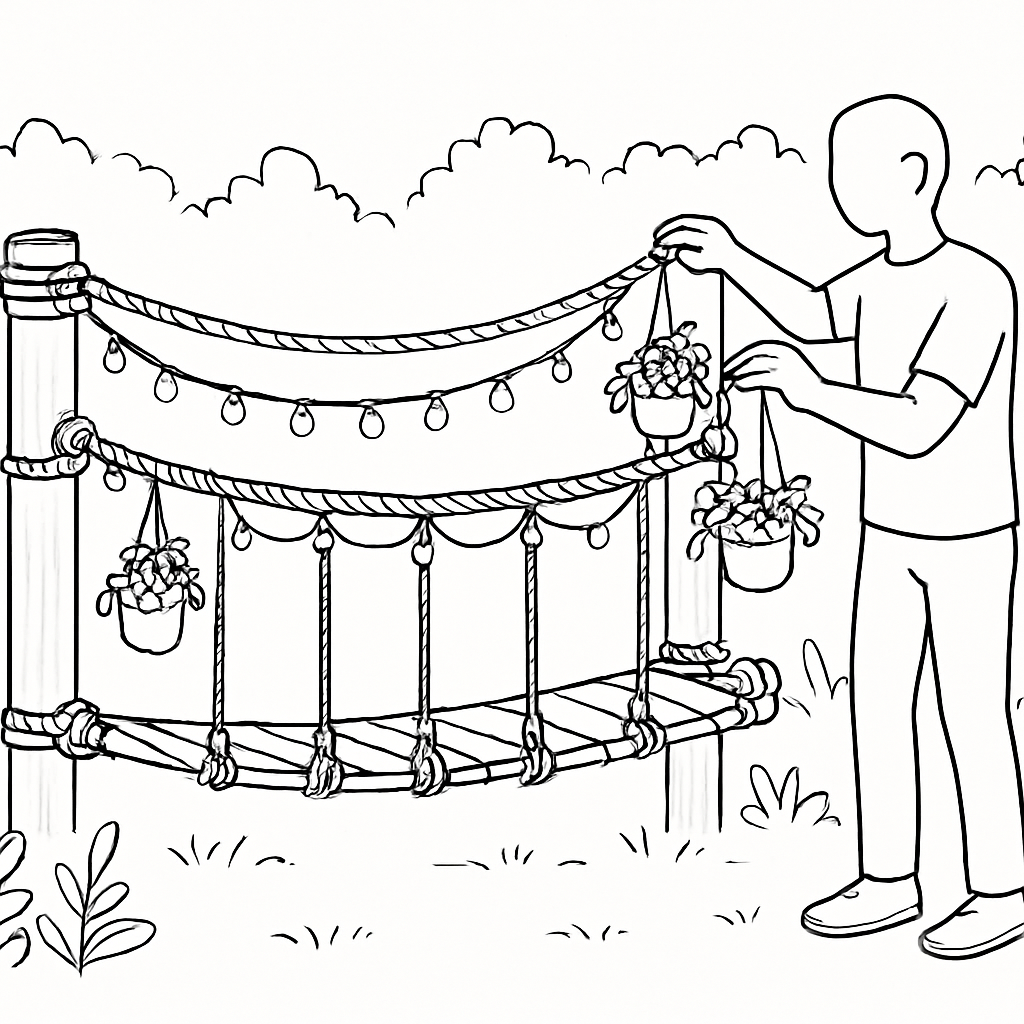
Your bridge structure now stands complete, but the final touches truly make it shine. Consider adding decorative knots at connection points—monkey’s fist knots or crown knots add nautical flair without compromising structural integrity.
Weave smaller diameter natural rope in patterns between your vertical balusters. These won’t bear weight but add tremendous visual texture.
Solar-powered fairy lights woven through the handrails create evening magic, illuminating your garden path with soft, inviting light.
For those embracing the tiny house philosophy of multi-functionality, consider how your bridge might serve dual purposes. Hanging planters from the underside utilizes vertical space. Small hooks on the handrail posts can hold garden tools or lanterns.
Maintenance: Preserving Your Creation
Like any outdoor structure, your rope bridge requires occasional attention to remain safe and beautiful. Inspect ropes monthly for signs of wear or weather damage. Tighten any loosened connections.
Synthetic ropes generally last 3-5 years outdoors depending on your climate. Natural ropes may need replacement more frequently. Budget for this maintenance as part of your garden care routine.
Wooden elements benefit from annual cleaning and resealing. Remove any algae growth with a mild bleach solution, allow to dry completely, then apply fresh sealer according to product directions.
During harsh winter months in northern climates, you might choose to remove and store the rope elements, reinstalling them in spring. This extra care extends their life considerably.
The Finished Journey
Standing back to admire your completed bridge brings a satisfaction few other garden projects can match. You’ve created not just a structure but an experience—a journey across space that changes how you and your guests interact with your garden.
In the context of tiny house living, your rope bridge exemplifies the philosophy of thoughtful, multi-purpose design. It serves as pathway, visual focal point, and vertical garden space while occupying minimal square footage.
The gentle sway beneath your feet as you cross connects you to your space in a new way—a physical reminder to slow down, notice details, and appreciate the journey. In our rushed world, such moments of mindful connection grow increasingly precious.
Your garden rope bridge stands as testament to the idea that beautiful, meaningful spaces don’t require vast expanses—just creativity, care, and the willingness to build something extraordinary with your own two hands.